Whiskey bacon maple syrup. Can you think of anything more perfect for this weekend? Try it on waffles or pancakes. The french/dutch baby (see post for picture)! Drink it straight (don’t). It’s not healthy. It doesn’t pretend to be. Because if you’re annnnything like me, this has become a time for self-improvement, to go with my self-isolating. So while during the week I am running and meditating, drinking chamomile tea, and trying to get enough water, on the weekends I am eating what is essentially sweetened bacon grease.
I hope I didn’t lose you. Hear me out. So many recipes have you crisp bacon right? Then the next step is almost always “remove the bacon and discard the grease”. This is generally done before they want you to heat some oil in the pan.
Y THO.
You have oil in the pan already! And you’re ALREADY planning on adding bacon, or you wouldn’t have gone through the trouble of perfectly crisping it. Unless you feel the need to for health reasons, why not just…leave it in! And if you are being careful about your health, I am very sorry, but this recipe may not be for you.
It’s basically alcohol, fat, and booze. No, it’s EXACTLY LIKE THAT. But sometimes you have to live a little. Whiskey bacon maple syrup is so easy. Like, so so easy. And a great addition to your weekend. Because we all need an escape right now. You can totally skip the whiskey if you want, but it gives it a nice, boozy touch.
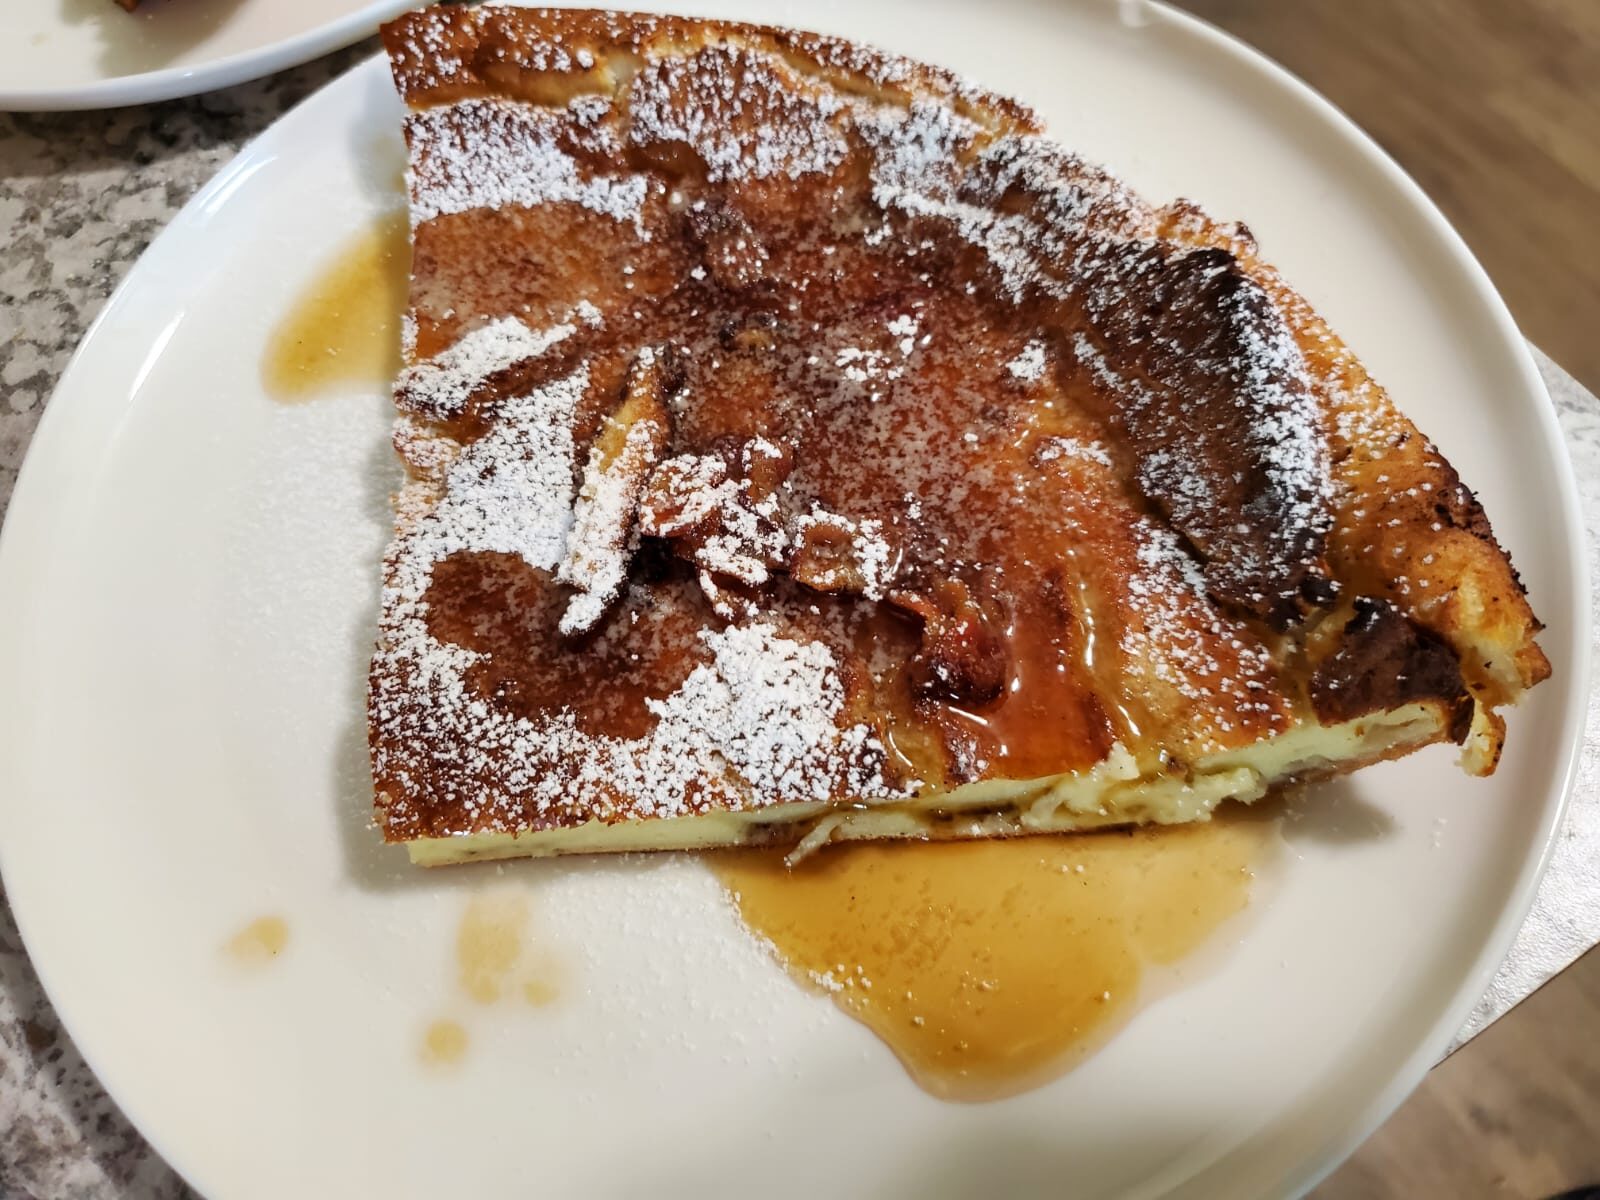
One of our favorite breakfast recipes is the dutch baby. It seems like every blog has a version, but the one I based my recipe on came out of a catalog. While it could have been Williams Sonoma, the true origin is lost to time. Have you ever seen a dutch baby? It’s the stuff of dreams. Warm and crispy, kind of fluffy, with a rise that you would see with a popover. They are gorgeous.
Over the years we made it so often I transferred it to the little handwritten cookbook that I made. I have played with the ratios and it’s always come out nice and fluffy and crispy. Except for this time. The time I decided to write about it. This time I chose to add some sourdough discard to the dough. I do it with a lot of recipes just to see what happens (when you make sourdough you end up with tons of discard). Oh boy was THAT a bad idea.
The flattest dutch baby you have ever seen,
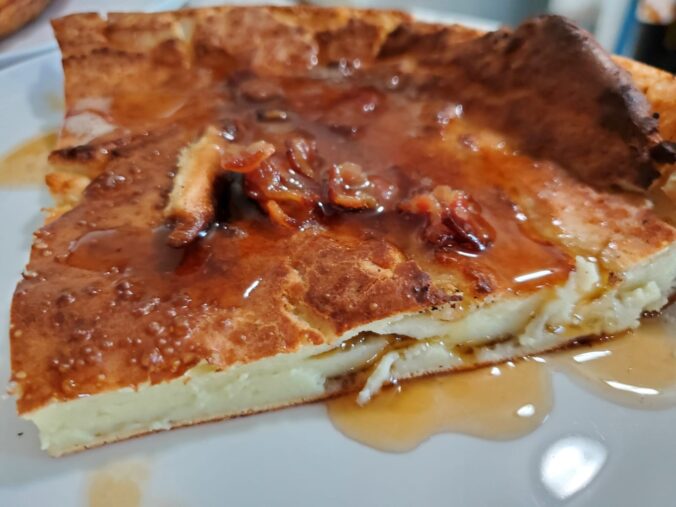
Except. It’s an almost dutch baby. Instead of it being fluffy and tall, like a popover, mine came out flat. Yes, it didn’t behave the way I expected. The insides were almost custardy. I had weighed the batter down with that discard, to the point where it couldn’t rise. But it tasted good. And the outside was crispy. It had turned into french toast. Baked french toast without the bread. Give it a try and let me know what you think. FYI, if you don’t have sourdough discard simply laying around, make it without. It will be delicious and as intended!
See? Doesn’t look too bad!
Note: You can make them in any oven-safe pan you have, but I tend to prefer cast-iron. And if it’s a weekend (or a really hard quarantine day) serve them with whiskey bacon maple syrup.
This recipe is heavily modified from a couple of different sources. I was looking for something that would be really versatile whether I was serving Indian or Mediterranean. I use the exact same recipe if it’s naan or a pita. The difference is for naan I brush it with ghee and sprinkle it with garlic powder. It sounds nuts, but don’t knock it until you try it!
2.5tbspolive oilflavored is really good here. Try herb or basil!
2tspgarlic powderif making naan
2tbspgheeif making naan
Instructions
In a large bowl, combine yeast, sugar, and water. Mix until they dissolve.
Put the bowl in a warm place for about 15 minutes, or until the mixture gets foamy looking on top.
Add the oil and the salt and incorporate them.
Using a dough whisk or a silicon spatula, mix in the flour in batches, until it starts to form together.
Dust your counter with flour and tip the dough out. Knead for two minutes, adding more water in tiny increments if it seems too dry. You want the dough to be soft and pliable, but not wet. You could also add some of the garlic powder at this stage if you really like garlic.
Cover with a damp towel and let it rest for 10 minutes. Just when it thinks you're done, come back and knead it for three more minutes.
Return the dough back to the bowl, cover with plastic wrap and cover THAT with a dry towel.
Put the bowl in a warm place for an hour, or until the dough is doubled.
My house is very cold, so I put my dough on a kitchen chair in front of a space heater. I monitor its progress and turn the bowl every now and then.
When the hour nearly up, place a large non-stick pan or cast iron in the cold oven with enough room to pull the rack in and out.
Preheat your oven to 475F.
Bring out the dough, punch it down, and divide it into 8 pieces. Form those into balls and allow them to rest covered with a damp towel for 10 minutes.
Roll each dough ball into the closest thing to a circle that you can make it.
If making naan, brush one side with ghee, and sprinkle with salt and garlic powder if you want it.
It making pita, do nothing.
Open the oven and carefully place your almost-circle on the hot pan. Keep and eye on it, how long it takes to cook will depend on how thin you made them. They will start to puff and then you can you can flip it CAREFULLY with tongs. Allow to cook for one more minute then remove. Repeat until all the dough is cooked.
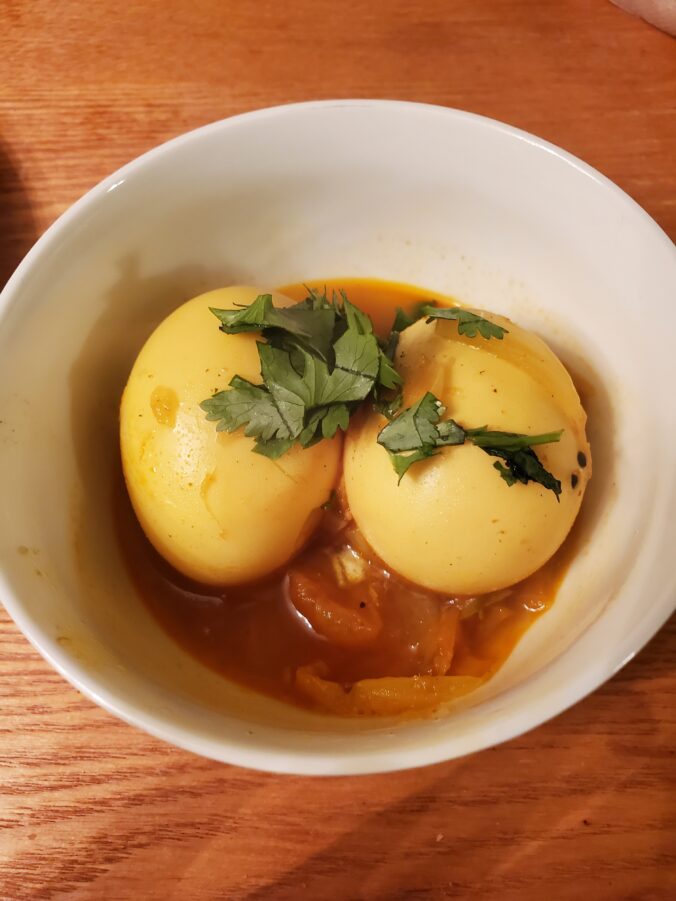
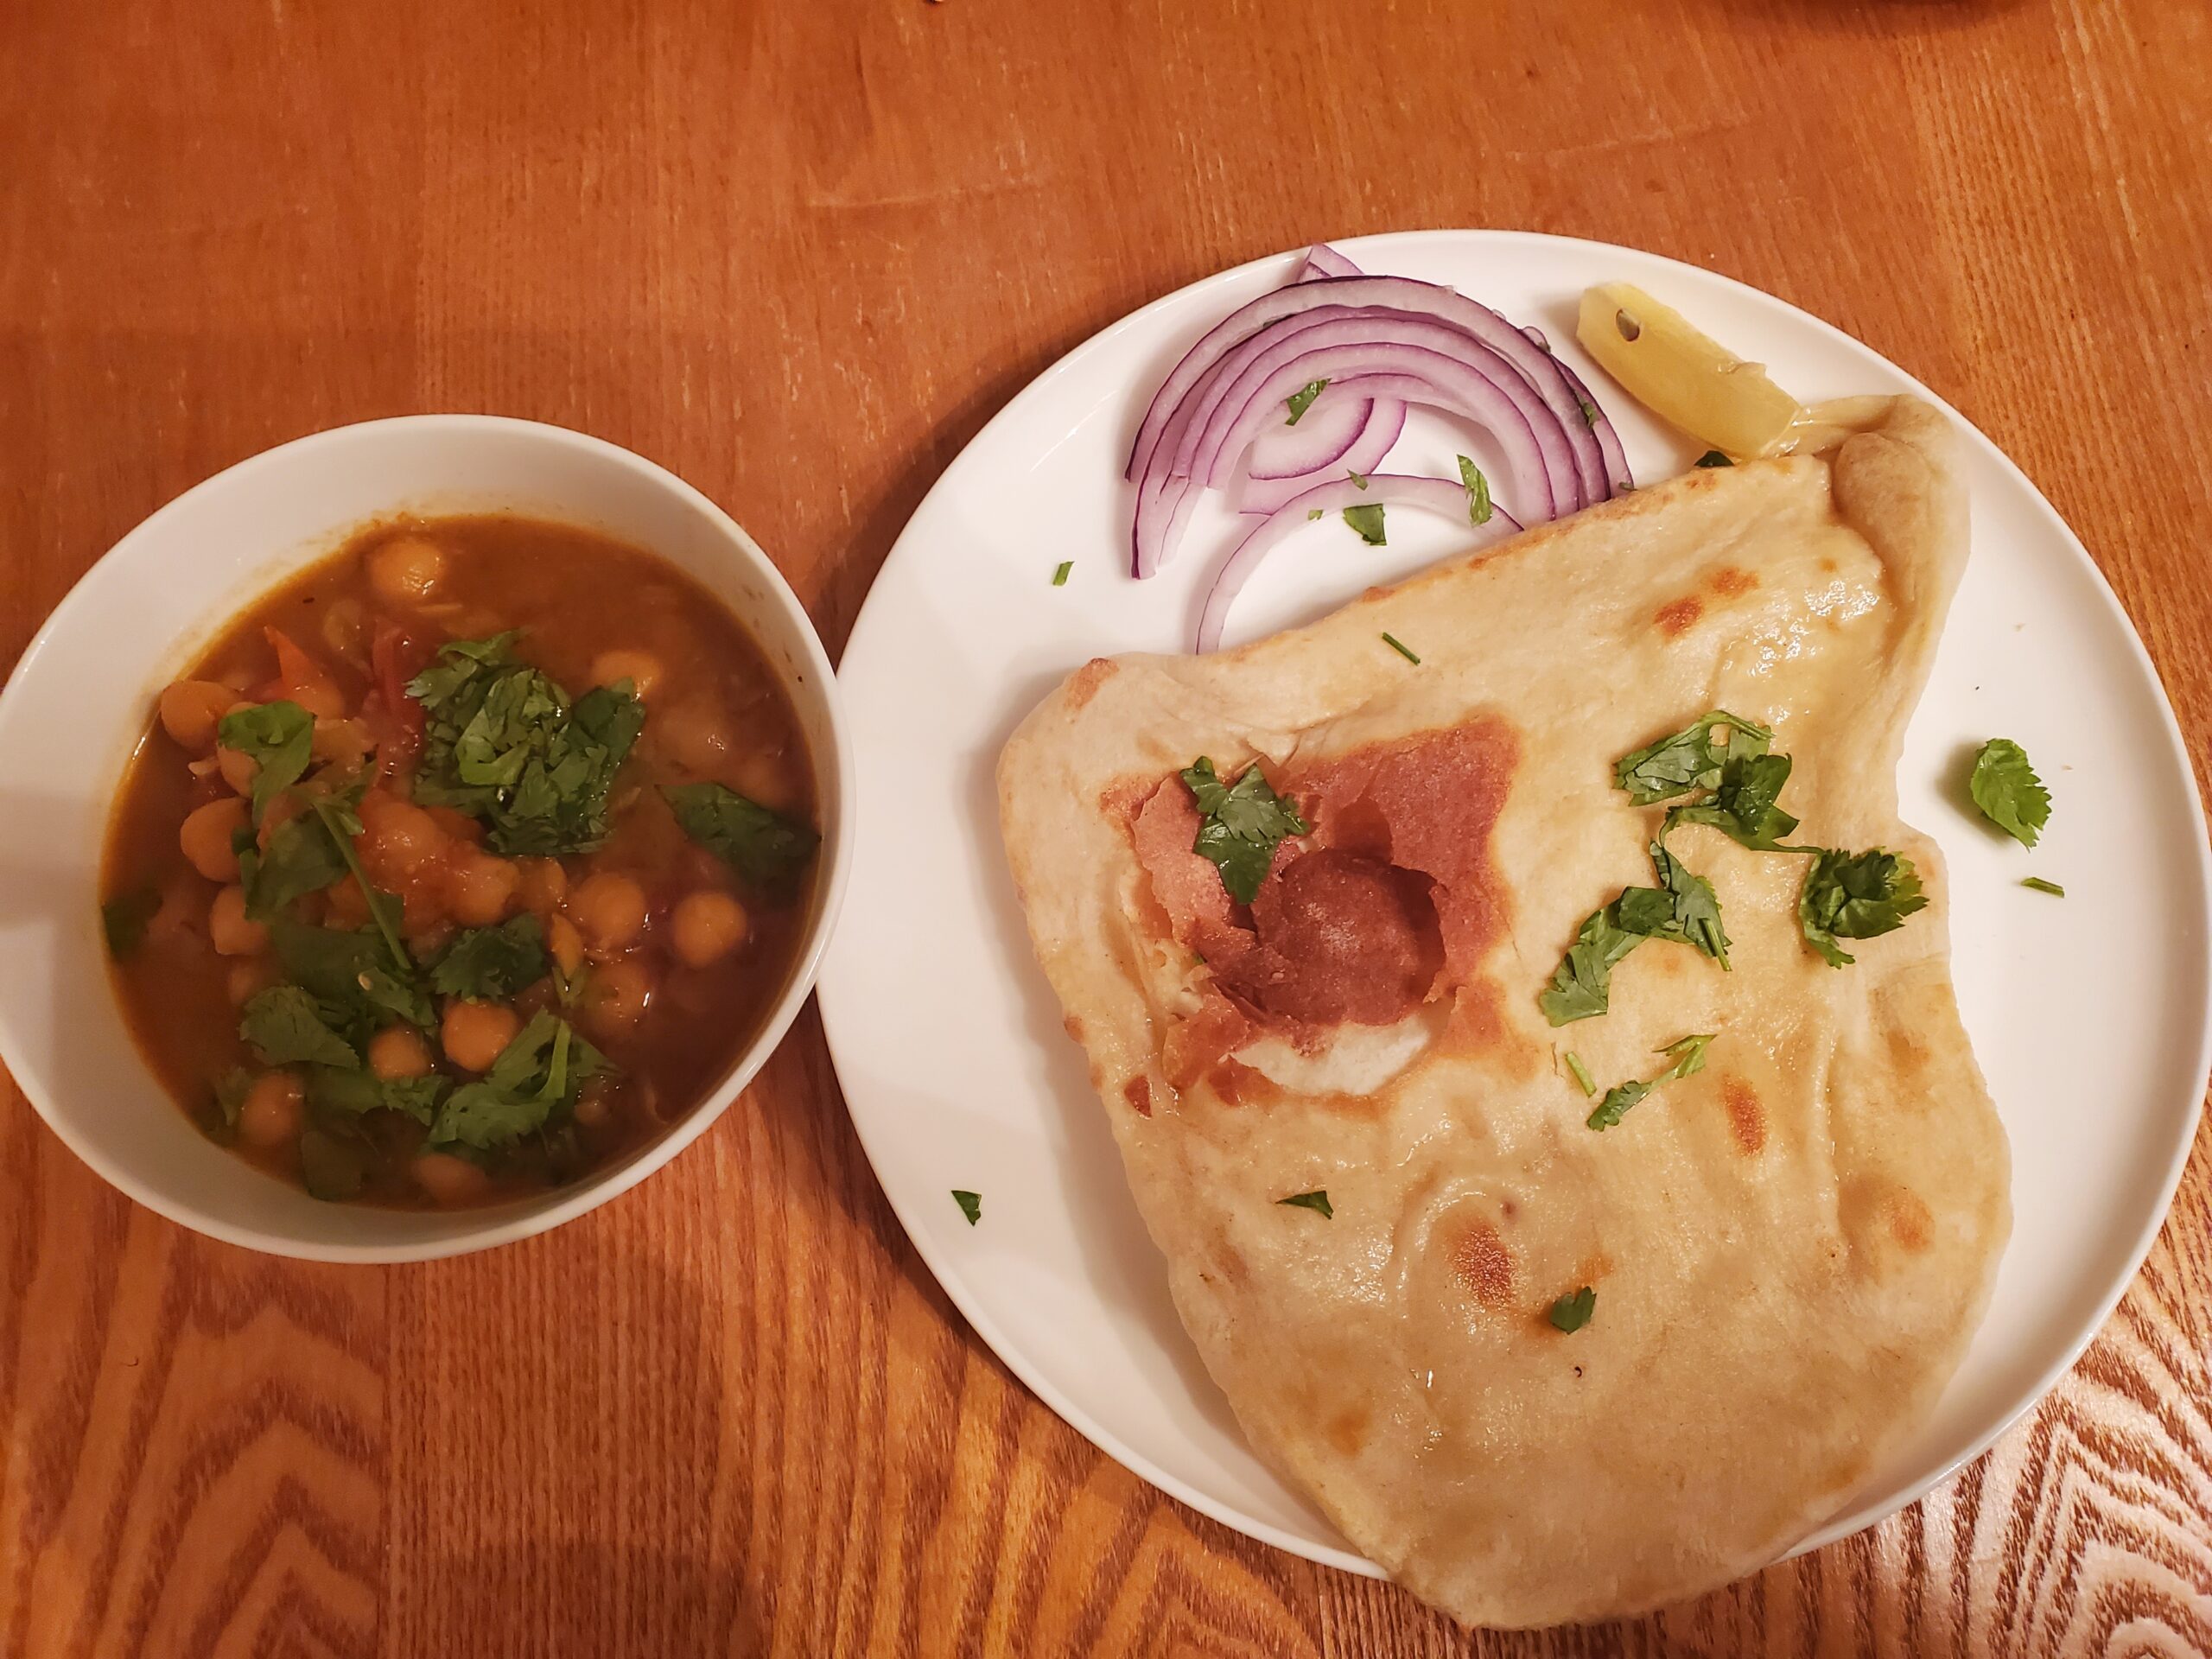
Boiled egg bhaji is unapologetically and unironically one of the easiest meals I have ever made. It is great as a last-minute, I don’t know what to make for dinner-dinner. This dish always feels for me a little like having breakfast for dinner since it’s eggs, but my husband is happy to be getting a bhaji. There is not a ton of prep, and nothing to remember to soak. That makes it a win for me when I just don’t feel like cooking.
The eggs end up being hard-hard boiled, but I don’t know that you could soft boil them the first time. I feel like they would break when you tried to peel them. If you want to make your own roti or naan that would be great, but some days it’s just easier to get some premade. The raw onion slices give it a little kick, as does the mango pickle.
2 or 3medium tomatoes, choppedOR 2 cups of cherry tomatoes whole and scored
1tspmustard seeds
3tspcumin seeds
1/2tsphaldi (turmeric powder)
chile powder to taste
salt to taste
Instructions
Heat oil over medium high heat. Cook the onions until they are translucent
Fry the ginger/garlic paste until the garlic smells cooked, being careful not to burn it,
Add mustard seeds and cumin seeds and cook until the seeds begin to pop.
Reduce the heat to medium-low. Quickly stir in the chile powder and the turmeric.
Add the tomatoes to the pot, stir to combine, add water to cover the tomatoes. Cover the pot and simmer for 5-10 minutes, or until the tomatoes are soft.
When the tomatoes are soft, add the boiled eggs. Salt to taste. If you feel like it needs more liquid, add enough water to make the amount of gravy you want. Cover pot and simmer for 10 minutes.
Serve with roti or rice, chopped cilantro, onion slices and mango pickle (sweet or sour)
Growing up in New Mexico, the best part of the year was the fall. The heat finally broke a little bit, there were a ton of events, and the green chile was being harvested. Everywhere you go you can smell roasting green chile. Grocery stores sell huge bags of chiles and have roaster drums set up outside. The drums go round and round, blistering the chiles. This makes the skin easier to remove and adds a slightly sweet smoky flavor. It’s magical.
Living in New Jersey, it is impossible to get green chile. At least, in the same way you can if you live in the Southwest. Even in the off-season, you can buy both red and green chiles frozen, which are the best alternative to fresh roasted. Here we have access to some jarred brands that are pretty decent, and the canned green chiles work in a pinch. So far I’ve never been able to find a brand that is hot enough, but I make do with what I have. The brand I used for this recipe was 505, courtesy of my sweet grandma. She still lives in New Mexico and she sends me what she can when I need my fix!
While I love to bake and cook, I hardly ever fry anything. It smells up the whole house and I never know what to do with the leftover oil. How long does it keep? How many times can I reuse it? Questions that neither Google nor Reddit has the answers for. When I fry it better be worth it. And boy were these worth it! Sweet but not too sweet. I called them choux-rros because I started with a choux dough (get it? Churros? Choux-rros??) Light and fluffy, not heavy at all. They were the perfect end to dinner. I used a dough whisk to help get everything incorporated. You don’t need one, but it really makes stirring dough easier. I served these bad boys with the vanilla caramel, with the added orange extract. They would also be AMAZING with chocolate fudge.
Icing bag and a large, star shaped piping tip (to get the churro shape)
Metal slotted spoon
Scissors
Cooling Rack
Ingredients
1/2cupunsalted butter(one stick)
1/2cupwater
1/2cup almond milkYou can use any kind of milk, I used what I had on hand.
1/4tspkosher saltfine grained
1tbspgranulated sugar
1tspvanilla extract
1cupAP flourScooped and leveled
3largeeggsbeaten
enough oil for frying
powdered sugarfor dusting
Instructions
Add the butter, sugar,vanilla, salt, sugar, and water into a sauce pan.
Turn the heat on medium and bring to a simmer, making sure the butter is melted.
Reduce temperature to low, and add the flour in all at once.
Stir the flour in the liquid until it forms a ball. Mix it around the pan for about another minute or so, until the raw flour smell goes away.
Move the dough to a bowl and allow to cool for about five minutes. This will bring the temperature down a little so the eggs won't scramble when you add them.
Mix in the beaten eggs, making sure they are incorprated. Your should have a sticky smooth dough.
Set aside and allow to cool while the oil heats.
When the oil is hot, move the dough to the piping bag.
Pipe the dough directly in the oil, using scissors to cut the dough when you like the length. Don't overcrowd the pot.
Using a metal slotted spoon, move the choux-rros around in the oil until they are brown on all sides and you can feel they are crispy. They will float as they cook.
When they are cooked, transfer to a cooling rack and allow to drain. Dust with powdered sugar and serve.
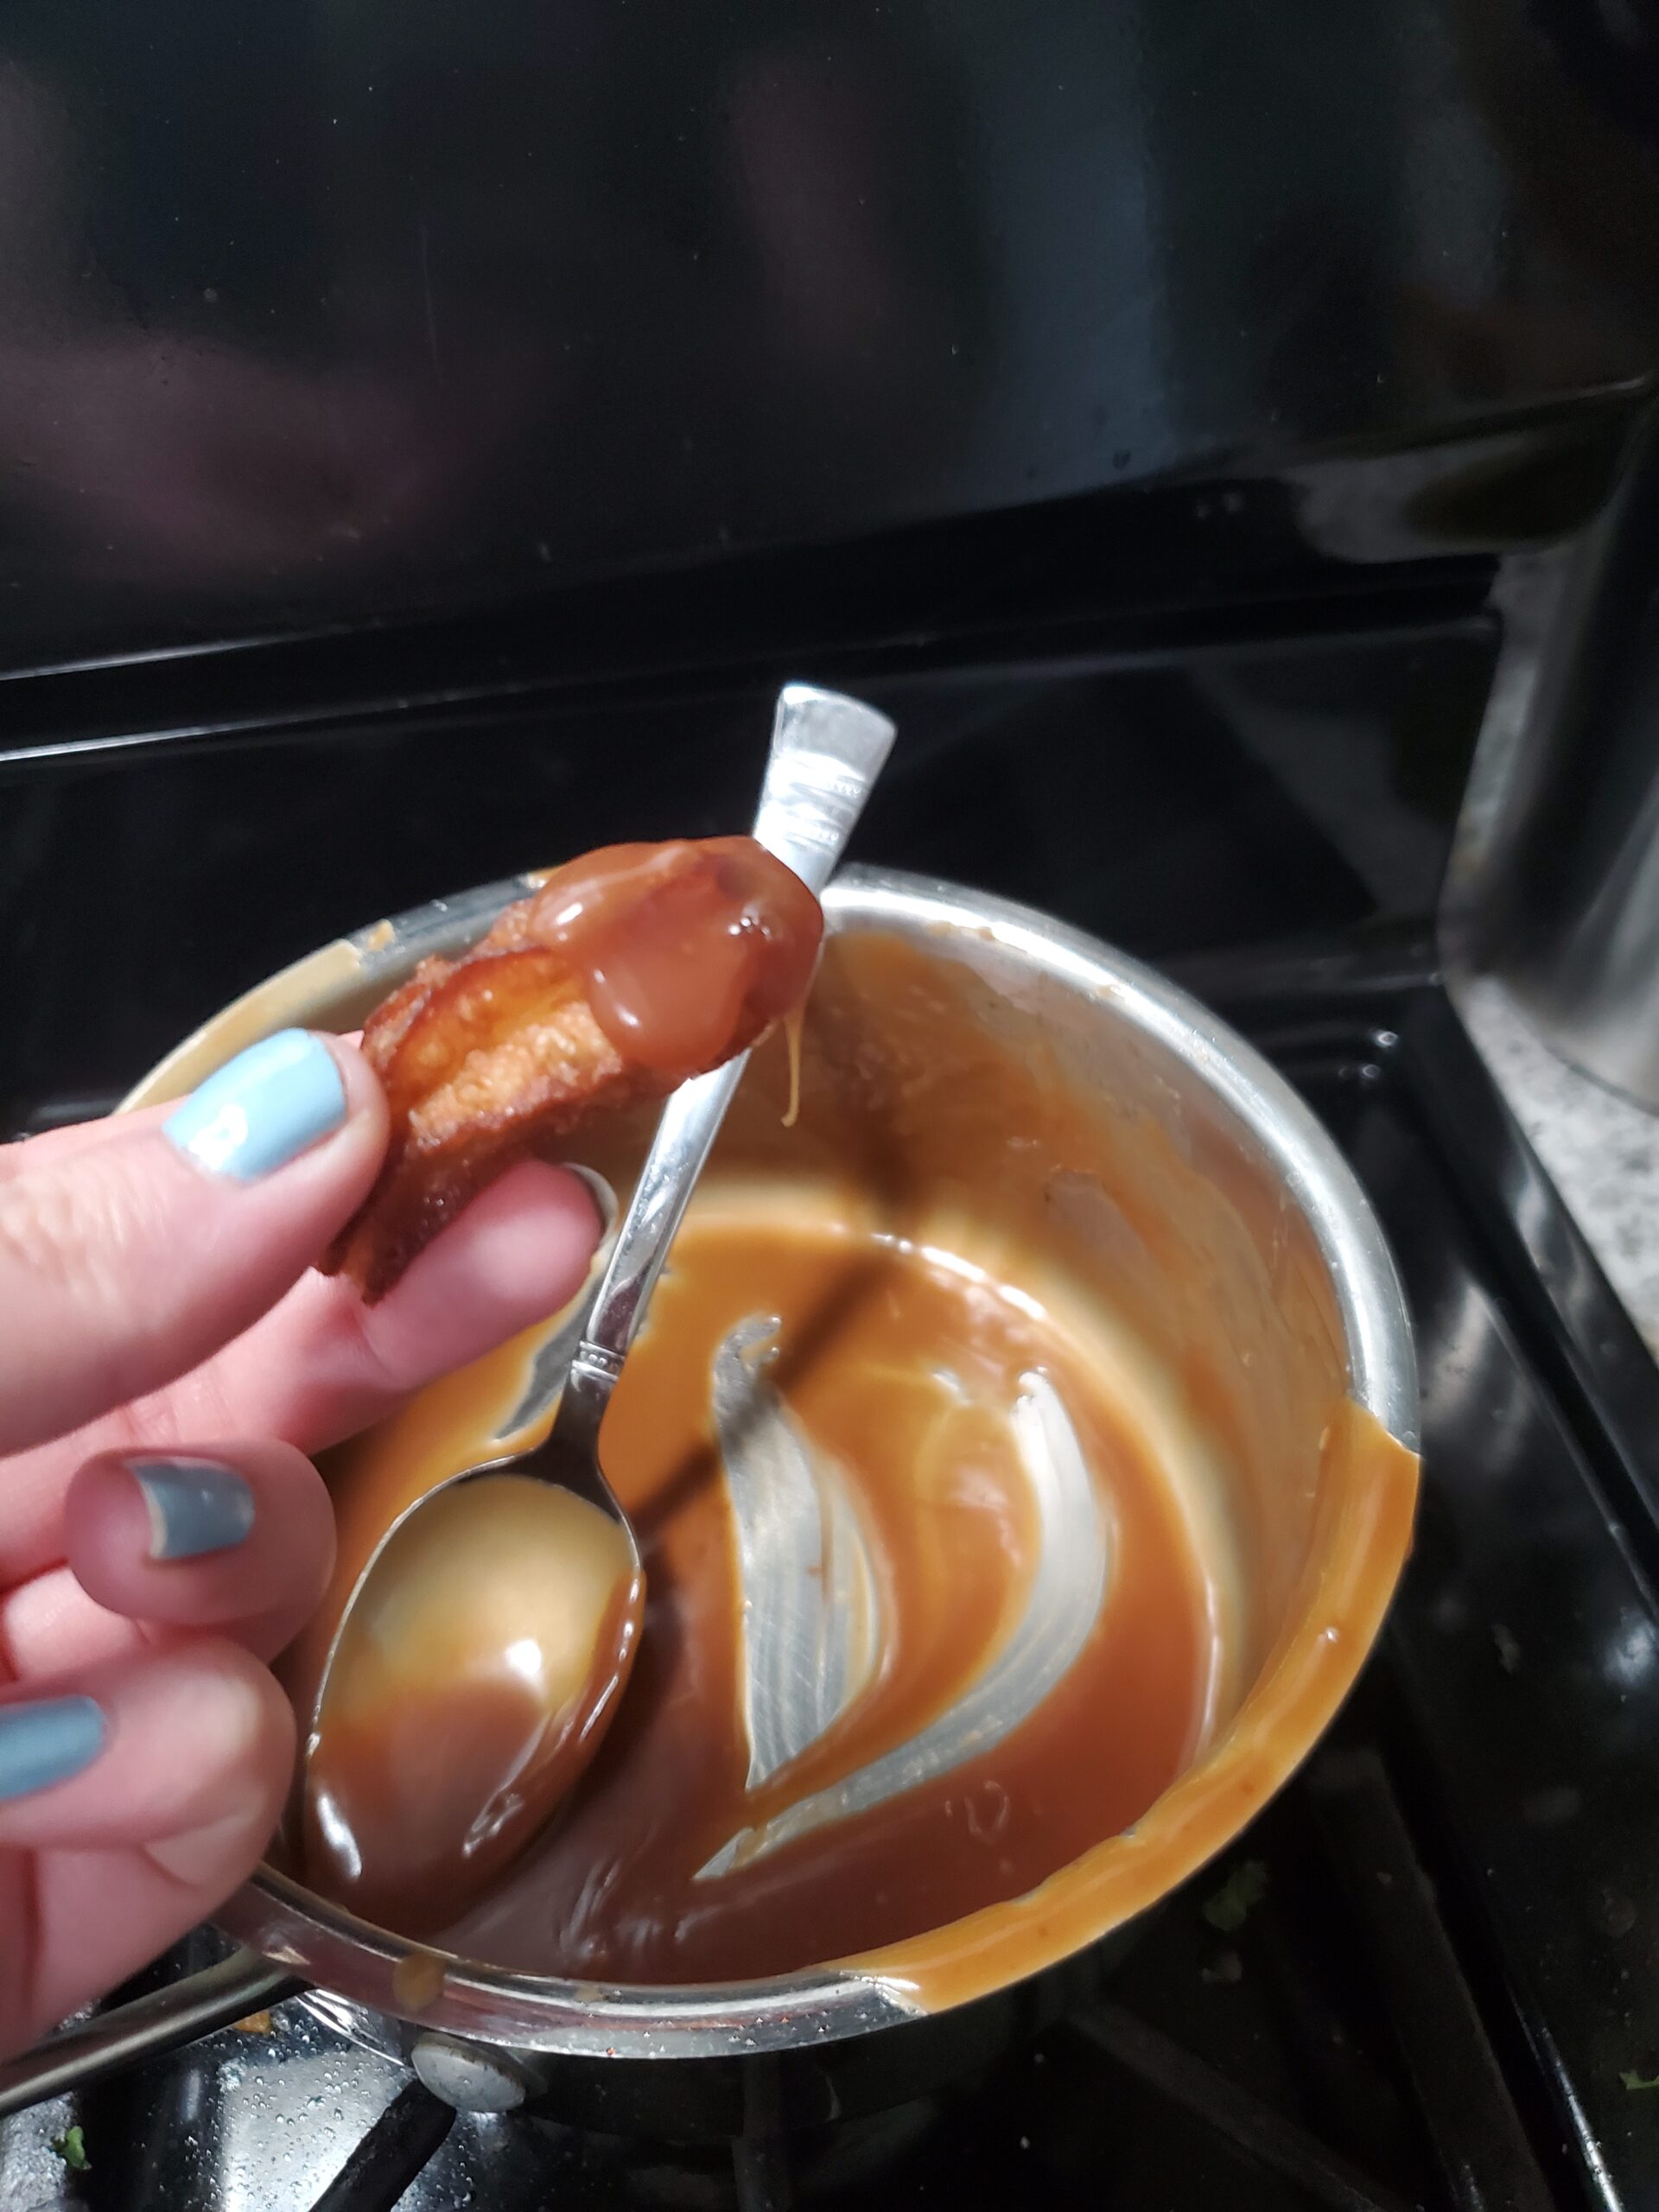
Making caramel can be tricky. Anyone that tells you otherwise is a liar. If the sugar is undercooked the caramel will come out grainy. And the margin of error between perfect, gooey caramel sauce and an acrid tasting burnt mess is hair fine. If you’ve never made caramel before and it doesn’t turn out the first time, just be patient and try again. I have made this a couple of times both with and without the orange extract and it has always come out for me! Serve with caramel apple oatmeal or choux-rros.
1/4tsporange extractOptional. Added last. Less is more.
kosher or sea saltto taste
Instructions
In the heavy bottomed pan, pour the cup of sugar, making sure it covers the bottom.
Add the water, stirring gently to make sure all the sugar is wet.
Turn the burner to medium low, allowing the sugar to start dissolving. After the heat is on resist the urge to stir it again,
Bring the water to a steady simmer. You will see the sugar start to melt and the bubbles will start looking thicker as it cooks. This will take longer than you think it will, but keep an eye on it for it to start to turn amber. If it looks like it is getting darker in patches instead of uniformly, I will GENTLY swirl the pan to even things out.
Allow it to bubble and cook until the liquid is the color of caramel (duh) and is starting to smell kind of nutty. Be careful not to let it burn!
Turn off the heat.
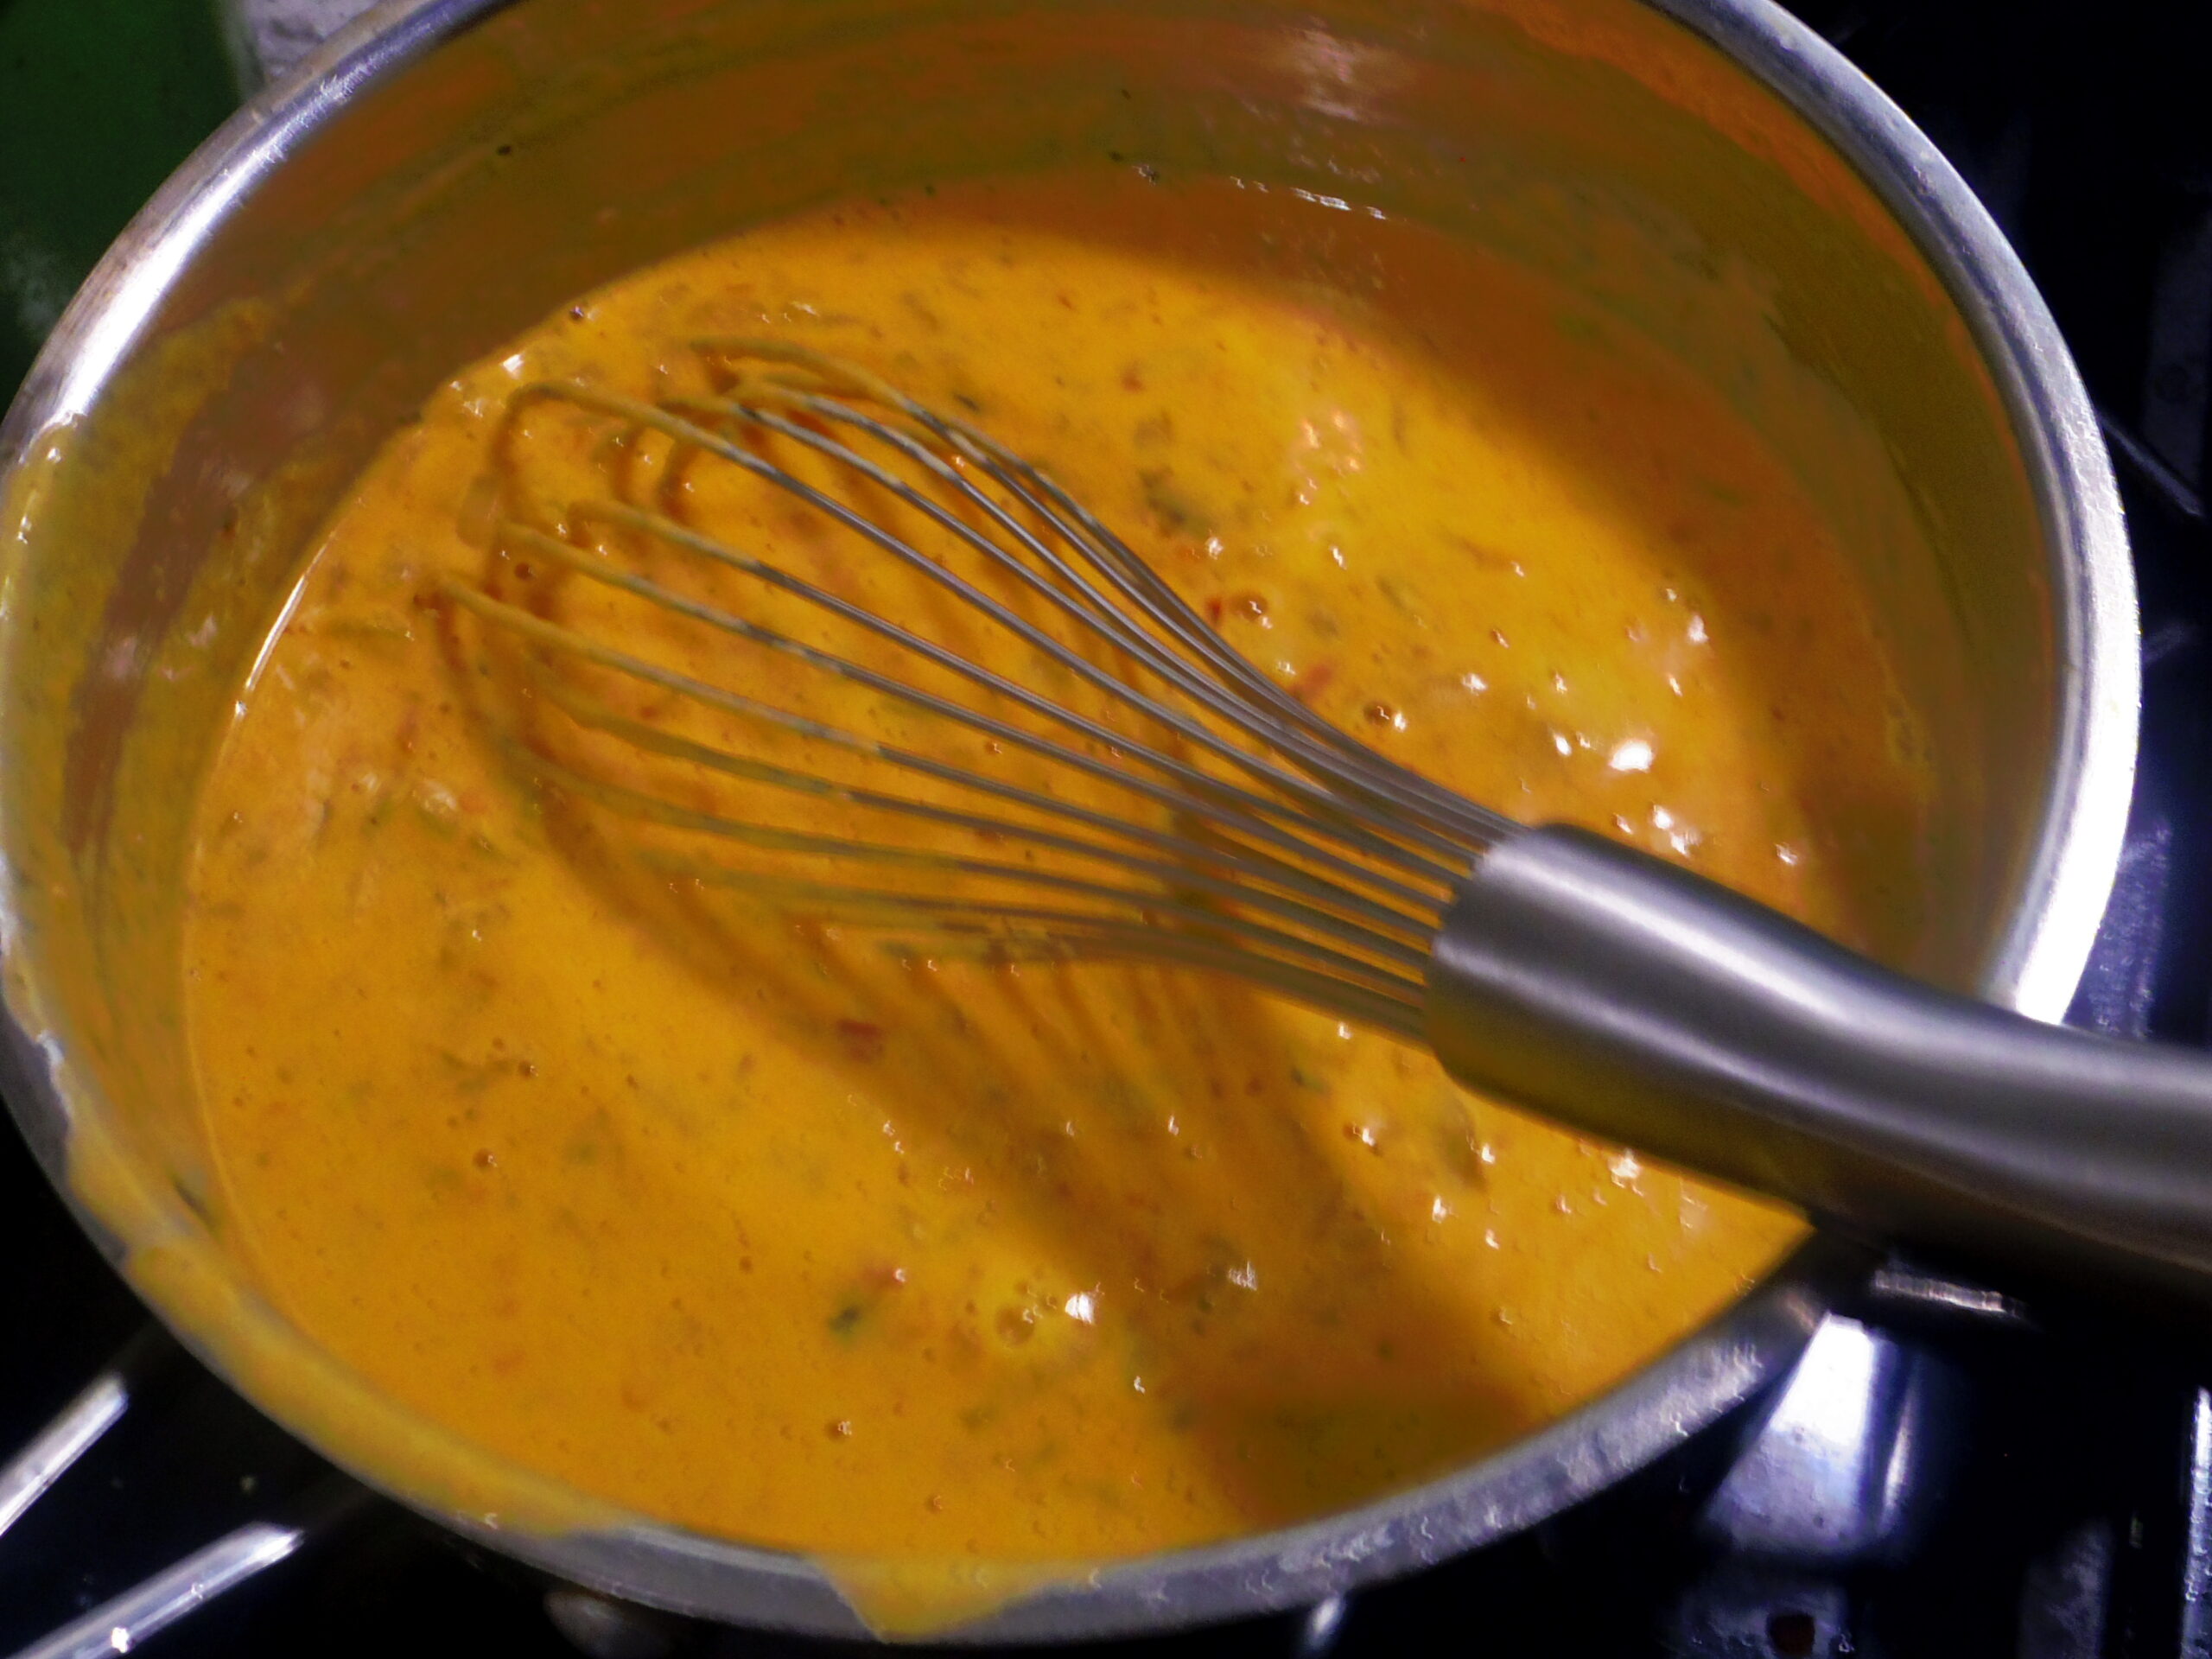
Whisk in the cream, butter and vanilla. The caramel might seize when you add the cream, and that's ok. Just keep whisking.
At this point you should have smooth caramel sauce. Using a spoon (and patience or YOU WILL BURN YOURSELF) taste the caramel. Add salt if needed. If desired, add a tiny bit of orange extract. Less is more.
It’s been so cold. Like, highs in the low 50’s and rainy. But not soothing, open the windows and curl up with a book rain. Nope. Cold, spitting mist. I cannot believe it’s almost May. When this first started, I assumed we would be back to work by mid-May, and now who knows. At least I can work from home, and I’m taking full advantage of not having a commute. I’ve been trying to get in some workouts. I’ve been playing A LOT of God of War and reading more. I hope that any of the positive habits I’ve instilled follow me past the isolation.
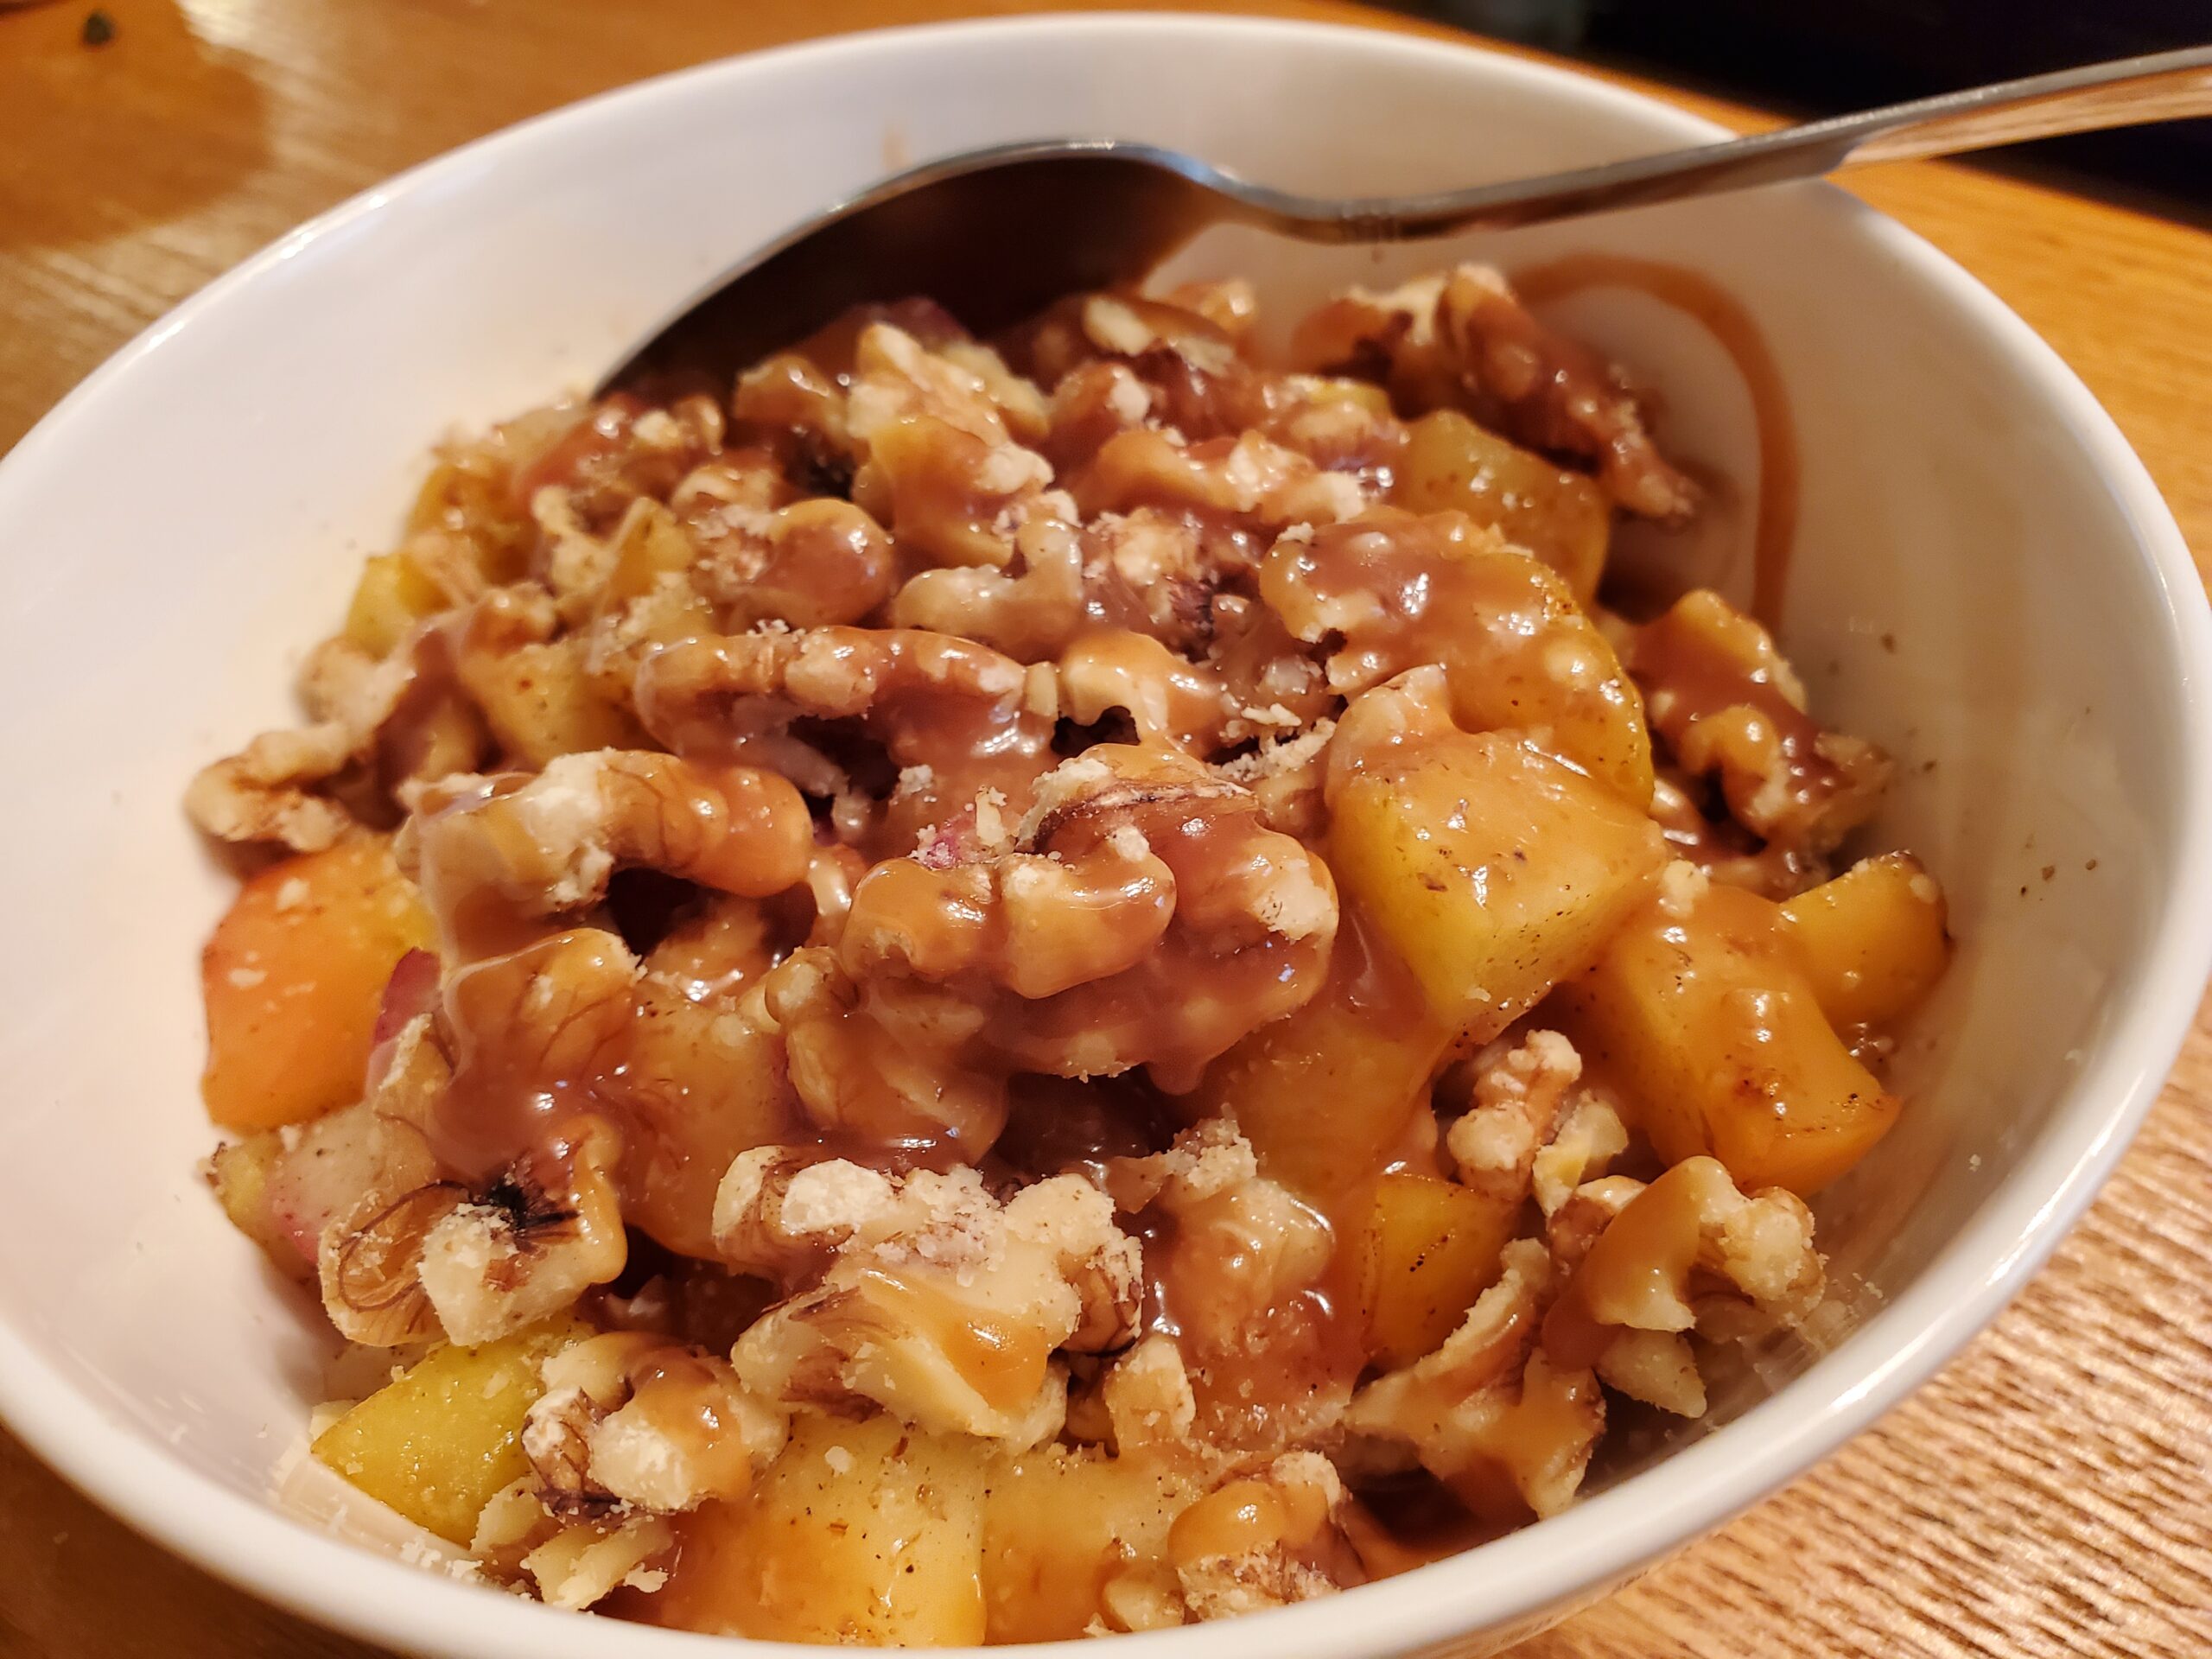
Since it’s been so cold and moral has been kind of low, this weekend I decided to make caramel apple oatmeal. It was warm and sweet and spicy like good apple pie. I made the caramel from scratch, but if you are intimidated or have a jar of caramel topping in your fridge use that instead!
Ingredients for Oatmeal
Two TBSP of salted butter
Two medium apples, any kind, skin on or off, diced
Three TSP King Arthur yuletide cheer spice (this may be a seasonal offering from them; I can’t find it on their website currently). You can also use:
1/2 TSP of ground cinnamon, ground cardamom, and ground allspice
1/4 TSP of nutmeg and ground coriander
1/2 a lemon worth of juice
Two cups of milk (I used dairy, but you can use any kind)
Two cups of old fashioned rolled oats
Kosher or pink salt
One TSP vanilla extract
Two TSP white sugar
Brown Sugar to Taste
Crushed Walnuts or Pecans (optional)
Instructions
Melt butter in a skillet over medium heat, until it starts to turn brown and smell nutty.
Add half the apple and all the spices, cooking until the apple starts to soften.
Add the rest of the apple and cook until the first half is very soft and the second half are beginning to soften.
Finish with lemon juice
In a saucepan, bring milk to a gentle boil.
Stir in vanilla extract and salt.
Stir in oats and reduce heat to a bare simmer, cooking until oats are creamy.
Add brown sugar, then taste for sugar and salt, adjusting both to taste. Add more milk if the oats seem too stiff.
Transfer oats to a bowl, topping with apples, crushed walnuts or pecans, and caramel sauce.
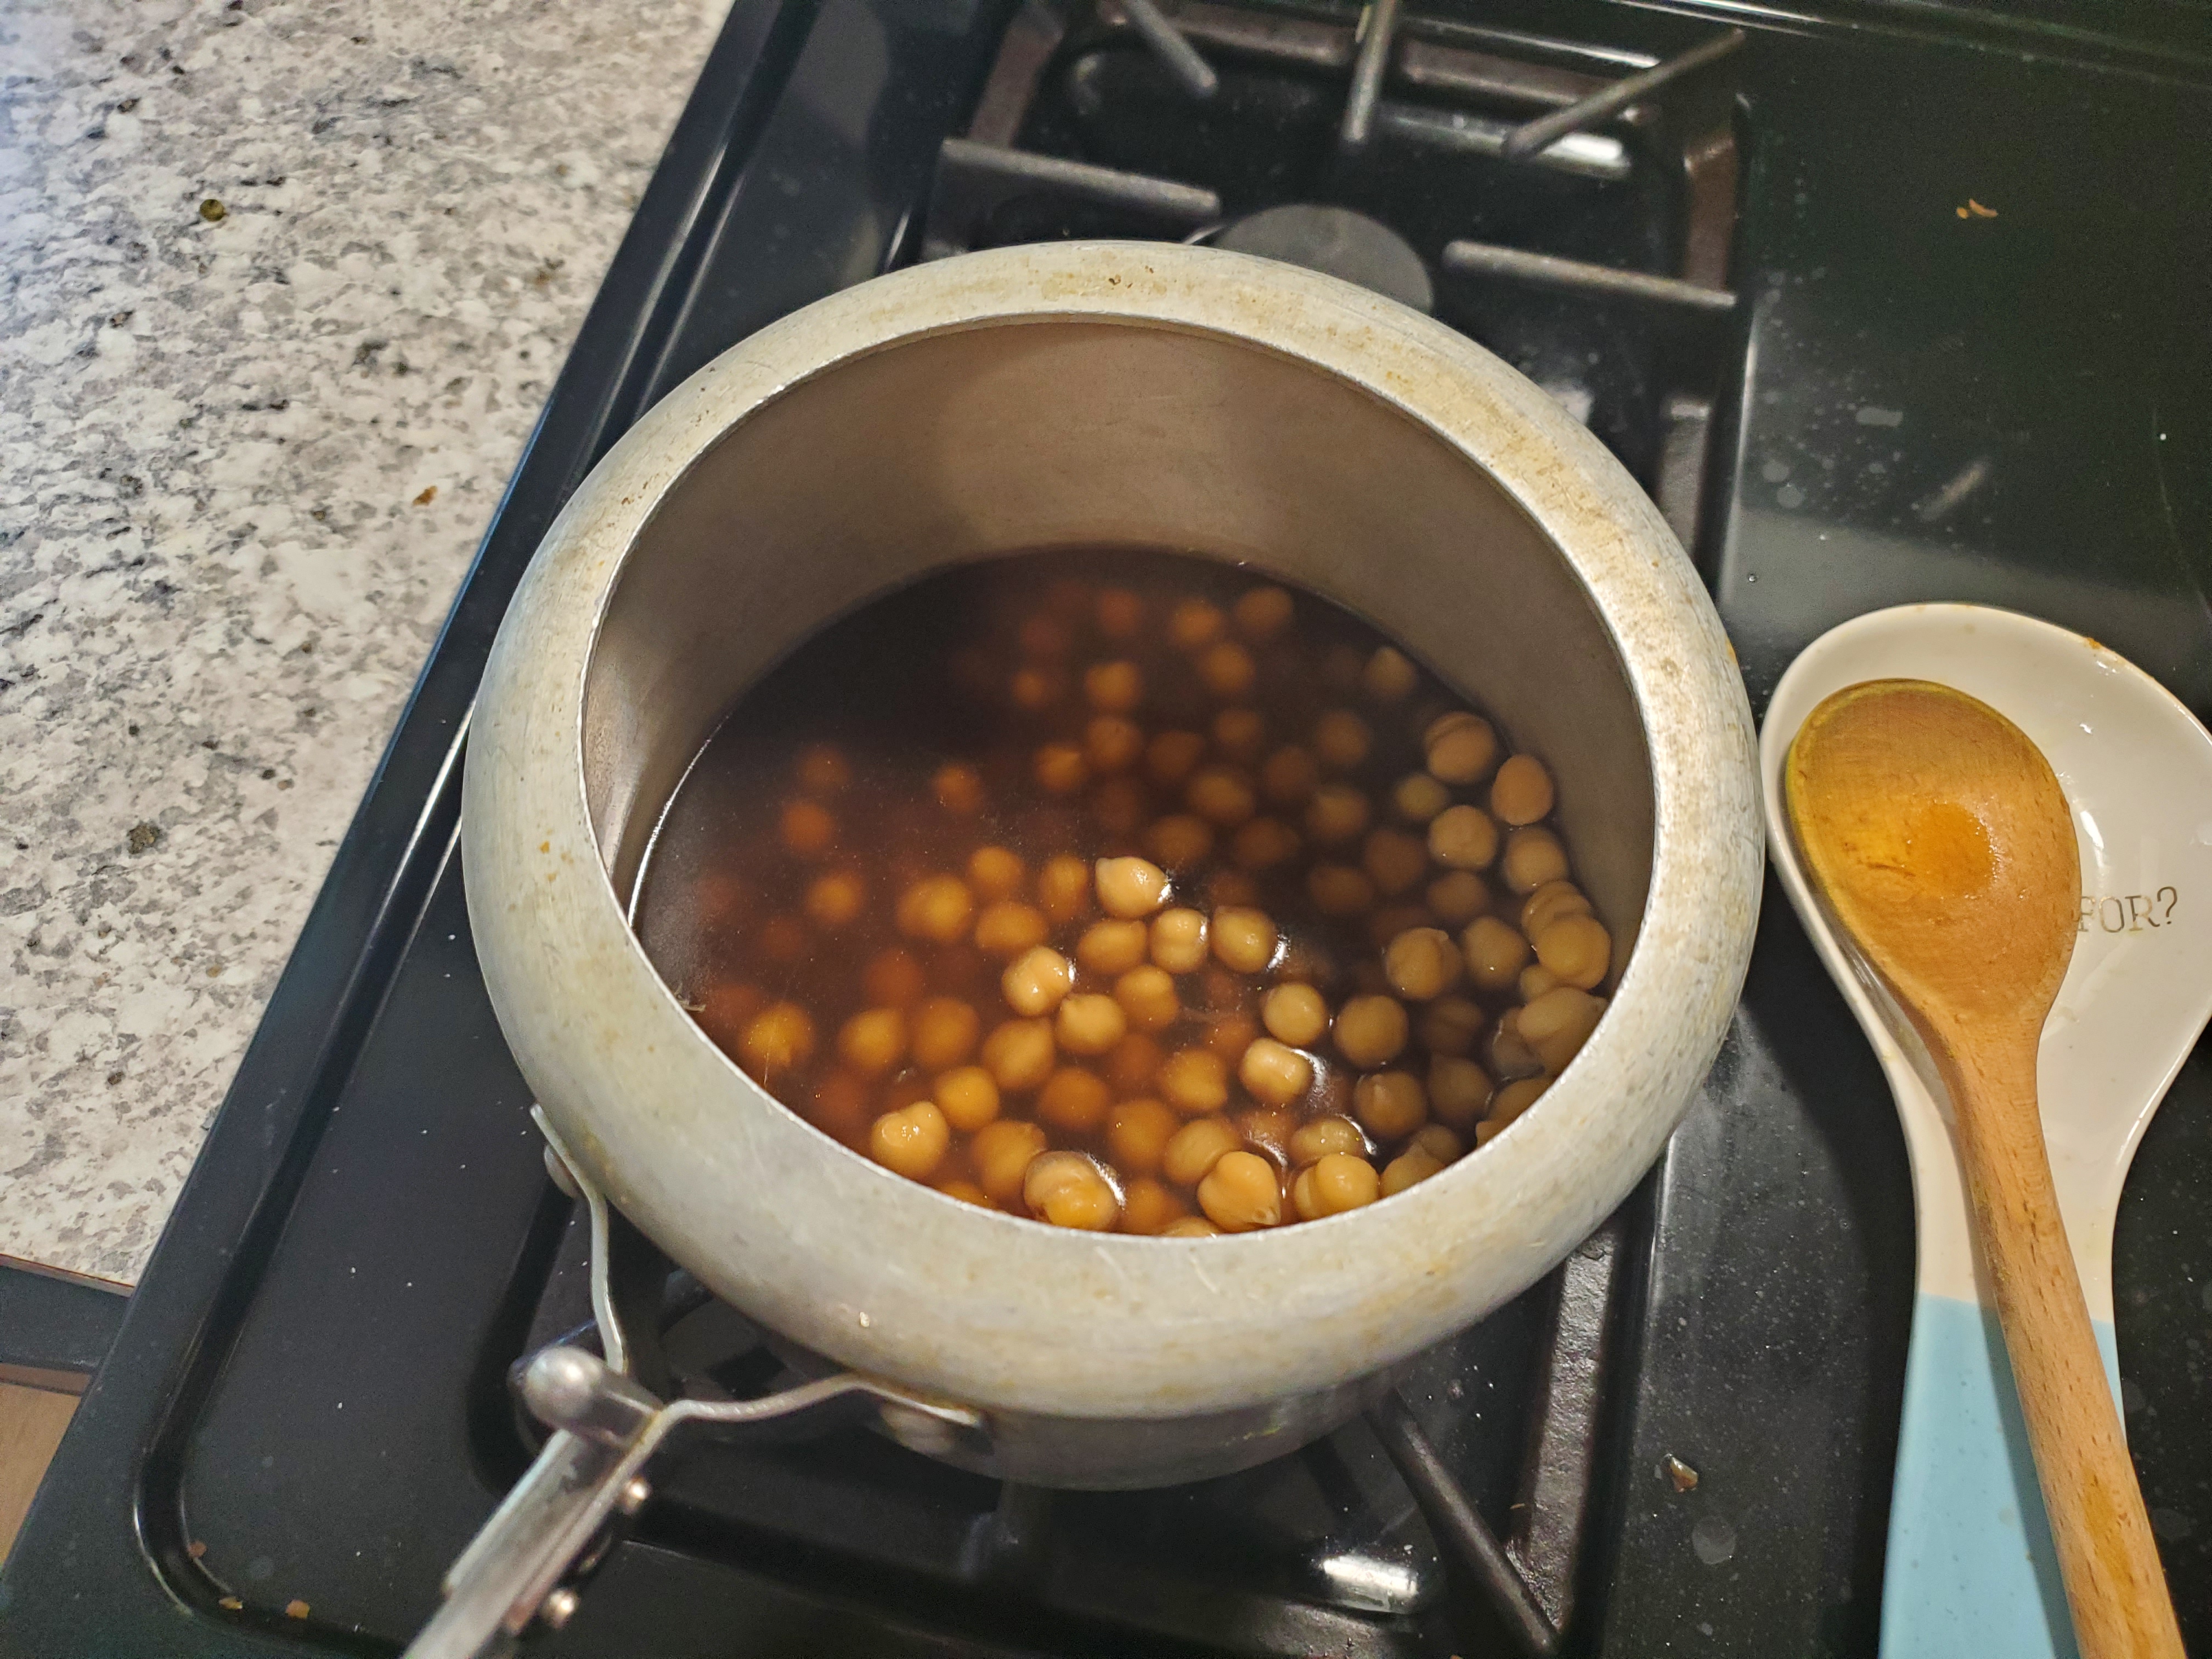
One of my husband’s favorite meals is chole, AKA channa masala, AKA chickpeas that have been bhajied. While it is a pretty simple recipe, it took me a while to find something he liked and sufficiently reminded him of home. But let’s be real, who is going to turn down a home-cooked meal of any kind right? I have not tested this in an instant pot, because we don’t own one. What we have is an Indian style pressure cooker that does the “whistles”. They don’t whistle like a tea kettle, they make more of a loud, steam-filled pssssssshhhhhhhhh sound.
I asked a friend of mine recently how she cooks her chole, and she said she lets it cook for three whistles, or pssssssshhhhhhhhh’s. She said if you cook it for longer it makes the chickpeas mushy. I was surprised by that, because I always cook mine for eight whistles and I don’t feel the texture has ever been bad.
I am trying to find someone to test this recipe in an instant pot, so I will update if that happens!
Notes
When my husband makes this recipe he uses standard black tea. This can be purchased from an Indian grocery store. It can also be used to make chai, so it won’t go to waste. For this recipe, put the loose tea in reusable, fillable tea bags. These can also be found at the almost any grocery store if you know where to look.
I am lazy. I prefer to use a spiced tea like this. Any will brand will work if you find one with similar notes.
Ingredients
1.5 cup dried chickpeas (garbanzos) plus water for soaking
Vegetable broth to cover in a pressure cooker
Black tea in a bag (3 tsp for my husbands tea, 3 tea bags for mine)
1 inch of ginger root (peeled and chopped)
5 or 6 garlic cloves (peeled and chopped)
1 yellow onion chopped
1 or 2 thai or bird green chiles (chopped) – this you can adjust to your personal taste.
3 tablespoons canola or vegetable oil (olive works too but it burns faster)
½ teaspoon tumeric powder
½ teaspoon chile powder
1 tsp coriander powder
2 cups cherry tomatoes (scored) or 2 or 3 roma tomatoes (chopped)
2 teaspoons Garam Masala
Cilantro for garnish
Instructions
Soak the chickpeas overnight, on the counter in a bowl of water. Make sure that the chickpeas are submerged. You can even let them soak all day, but if you soak them TOO long (like more than a couple of days) they will start to sprout.
When the chickpeas are soft (can you cut them easily with a knife or your nail?) they are done soaking. Drain the water, put them in the pressure cooker with the black tea bags and cover with vegetable broth. DO NOT fill the pressure cooker with liquid, use just enough to cook the chickpeas.
Put the pressure cooker on the stove, make sure the lid is locked, and turn the heat to medium high. After 6-8 whistles (this will be some trial and error, your pressure cooker is different than mine!) turn the heat off and let the steam release slowly. When the steam is done releasing, scoop out the chickpeas, leaving the vegetable broth in the cooker for later.
The chickpeas will absorb some of the broth. This is normal!
While the chickpeas are cooking, prep the vegetables and make ginger garlic paste (chop the ginger and garlic into small pieces, add into a small food processor or mortar and pestle and grind to a paste).
In a sauce pot or dutch oven, heat the oil until it shimmers. Fry the onion until they start to brown. Add in the ginger garlic paste and fry until it smells cooked and not raw (about 5 minutes on a medium flame).
Add in the green chiles and cook for about 30 seconds before adding in the tumeric, chili powder, coriander powder, and salt. Stir and cook for about 30 or 45 seconds making sure the spices won’t burn.
Put the tomatoes in the pot and about ½ cup of the vegetable broth you reserved earlier. Cover the pot and let the tomatoes cook down for about 8 minutes (until they are very mushy).
Add in the chickpeas, cover with the broth, and let the chickpeas cook for 5 or 10 minutes to incorporate all the flavors. Taste for salt. Using a potato masher, squash the chickpeas a little to thicken the gravy. Finish with 2 teaspoons of garam masala, stirring to incorporate. Garnish with cilantro.